Completing Therapist Onboarding
Learn how to set up your professional profile with credentials, state licenses, practice information, and a bio
Last updated:
Why Complete Your Profile?
Your profile tells patients who they're working with — your credential appears next to your name on invitations and on notes you share, and your bio and practice details are available to the patients you're connected with. It also keeps your credentials and licenses in one place. Setup takes just a few minutes. If you're short on time, you can skip it and finish in Settings later.
The Four Steps
After you choose the therapist role, Eunoia opens Set up your practice profile with four steps and a progress bar:
- Credentials — your NPI, credential, experience, and specializations
- Licenses — the states where you're licensed
- Practice — your practice's name, contact details, and address
- Bio — a short introduction for your patients
Select Continue to save each step and move on, or Back to revisit the previous one. Most fields are optional, so fill in what you have.
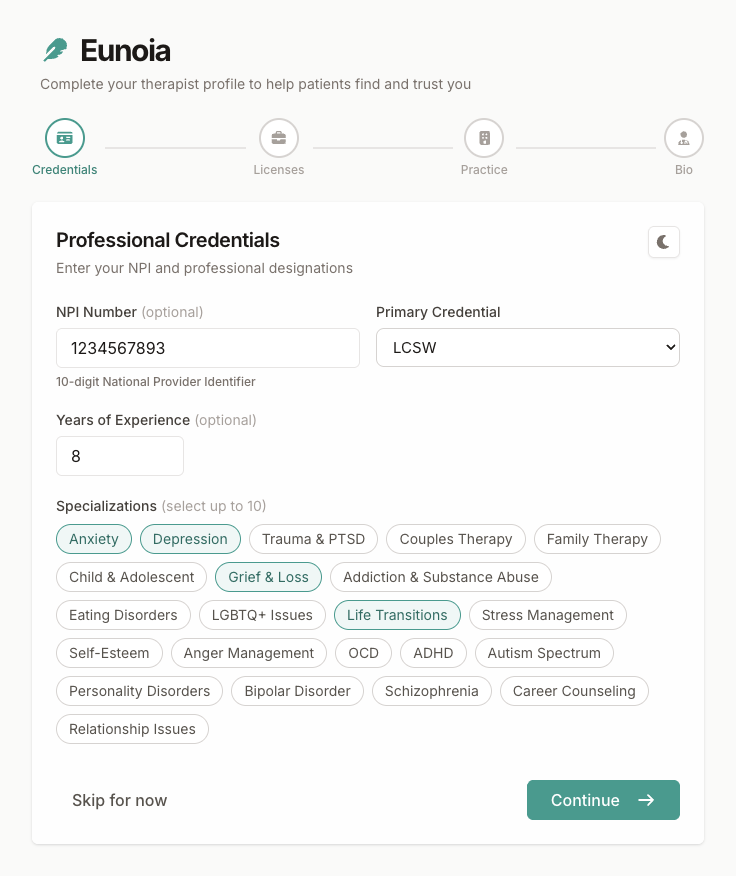
Step 1: Professional Credentials
Start with the foundation of your professional identity:
- NPI Number (optional) — your 10-digit National Provider Identifier
- Primary Credential — your main professional designation: LCSW, LMFT, LPC, LPCC, LMHC, PsyD, PhD, MD, NP, LCPC, LICSW, or Other
- Years of Experience (optional)
- Specializations — select up to 10, such as Anxiety, Depression, Trauma & PTSD, Couples Therapy, Grief & Loss, Life Transitions, or Stress Management
Your credential appears next to your name — for example, on invitations and on notes you share with patients.
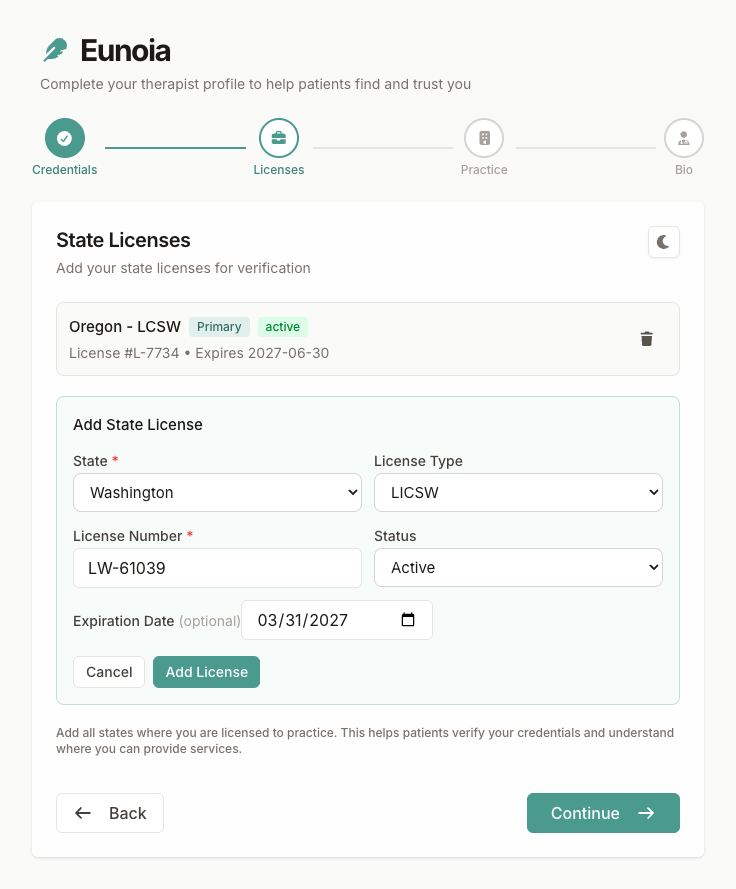
Step 2: State Licenses
Add a license for each state where you're licensed to practice:
- Select Add State License
- Choose the State and License Type
- Enter the License Number
- Set the Status — Active, Pending, Expired, or Inactive
- Add the Expiration Date (optional) and select Add License
Your first license becomes your primary license; you can choose a different one or remove a license before continuing. If you see patients by video in other states, add each of those licenses too. Patients may see the state of your primary license alongside notes you share with them.
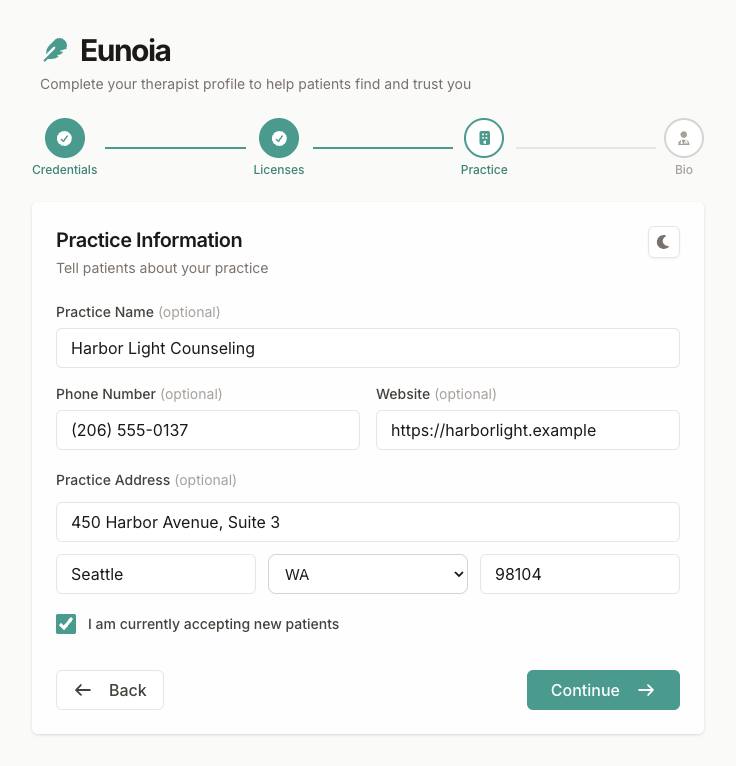
Step 3: Practice Information
Share the basics of your practice — every field is optional:
- Practice Name — your solo practice or clinic
- Phone and Website
- Address — street, city, state, and ZIP code
- I am currently accepting new patients — tick it if you're taking new patients
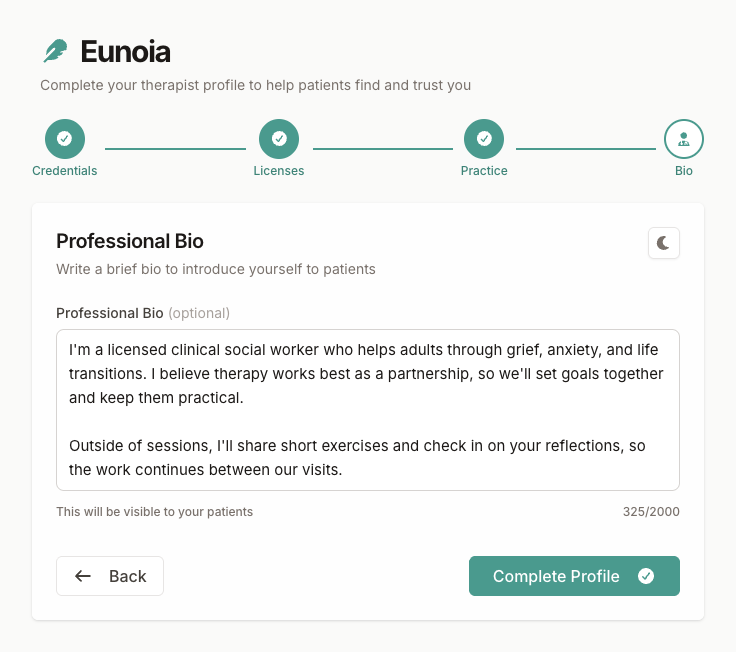
Step 4: Professional Bio
Your bio is a short introduction for your patients (up to 2,000 characters). A few tips:
- Introduce yourself warmly, and describe your approach to therapy
- Mention who you work with and what patients can expect
- Write in the first person — "I help adults navigating…"
- Skip the jargon — two or three short paragraphs is plenty
Your bio is visible to your patients. It's optional, and you can edit it anytime in Settings → Profile.
Finishing Up
On the last step, select Complete Profile. You'll see Your profile is complete! and then land on your therapist dashboard, ready to invite your first patient. Everything you entered stays editable in Settings.
Editing Your Profile Later
Update your profile anytime from Settings (open your account menu at the top right):
- Profile — your photo, display name, time zone, and professional bio
- Credentials — NPI, primary credential, years of experience, and specializations
- Licenses — add, edit, or remove state licenses and choose your primary license
- Practice — practice name, phone, website, address, and whether you're accepting new patients
See Managing Your Settings for details.